
This guide allows you to transfer a site from one hosting to another or simply launch your php-mysql site on a shared hosting service. Sites on such popular cms as Wordpress, Joomla, Bitrix, Drupal and others including those developed by php programmers work using php interpreter and mysql database (new mariadb). Files serve as the logic of work, referring to the database in which information and structure are stored (news, articles, directories, etc.)
- File Transfer:
To transfer a site, you will need an archive with site files and a database file (usually with the extension .sql)
Go to the hosting control panel, then select the file manager in the menu and click the upload button by selecting the archive file from your computer. Files must be uploaded to a folder corresponding to your domain; for the first site, the default folder is httpdocs.
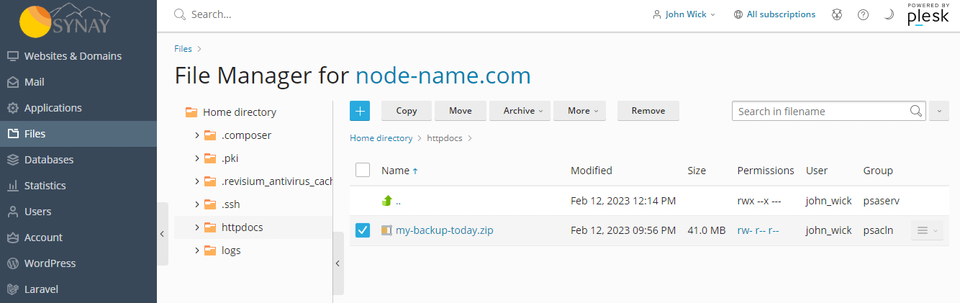
Select the archive and click the Extract files button, depending on the size of the archive it may take some time. After the operation is completed, you need to make sure that the files and folders are in the root directory of httpdocs or another one that you configured in the control panel in advance. If the archive also contains its own folder, you can transfer it to the root by selecting all the files and clicking the Move button. The archive file should be deleted for security reasons so that it cannot be downloaded via a direct link.
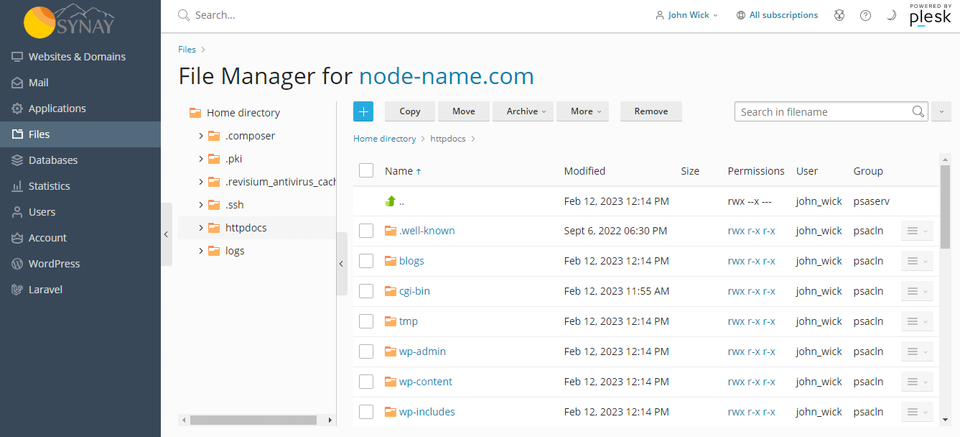
Having received the following structure as shown in the screenshot above, now we can proceed to import the database of your site.
- Database Migration:
To transfer the database, go to the database section of the hosting control panel. Click Add Database. In the window that opens, fill in the database name, username and password, and also specify the appropriate site from the drop-down menu. If necessary, you can set access rights to the database:
- Allow only local connections
- Allow remote connections from any computer
- Allow remote connections from specified computers
The data that you specify must be recorded in a notebook (Database name, username, user password), they will be needed in the future to indicate in your cms configuration file.

In the menu that appears, select the import backup item, in the .sql file selection window, select its location, from your PC or from previously downloaded archive files. After the import is completed, you will see a message and the size of the database will also appear. Next, go to the configuration file for your cms, in our case it is config.php, open it through the editor in the file manager and find the dates associated with the database and fill in the data that you specified when creating the database in the control panel. For wordpress, it will look something like this:
define('DB_NAME', 'admin_site');
define('DB_USER', 'admin_user');
define('DB_PASSWORD', 'PassW0rd');
define('DB_HOST', 'localhost');
In different cms, the lines or the name of the configuration file may differ, but the data is always taken from those that you specified. Now you can open your site in a browser and check its operation. If errors occur, you can see the reason in the log and correct it. You can also contact technical support for help by opening a request through your personal account.
Note: For sites and large databases (more than 2 GB), we recommend transferring the archive with the database file to the hosting via ftp server. And import the database not from your PC, but from the folder on the hosting where you downloaded all the data.